
If you want to setup SPF, DMARC, and DKIM on Microsoft365 (formerly Office365) Exchange Online, read previous part about How to Setup SPF and DMARC with some simple explanation first.
On Microsoft365 with Exchange Online you can setup your own domain so it pointed to Exchange Online “MTA” in order to enable DKIM certificate of your mail server (Exchange Online) related to your domain.
To do this, make sure you are connected to internet on your Windows PC. Open PowerShell, you need to Run as Administrator.
WARNING! Do not close PowerShell until Disconnect command executed at the end of this setting guide.
STEP 1: Install Prerequisite
Install AzureAD, MSOnline, and ExchangeOnlineManagement on PowerShell with this command:
Install-Module -Name AzureAD
Install-Module -Name MSOnline
Install-Module -Name ExchangeOnlineManagement
STEP 2: Save Credential
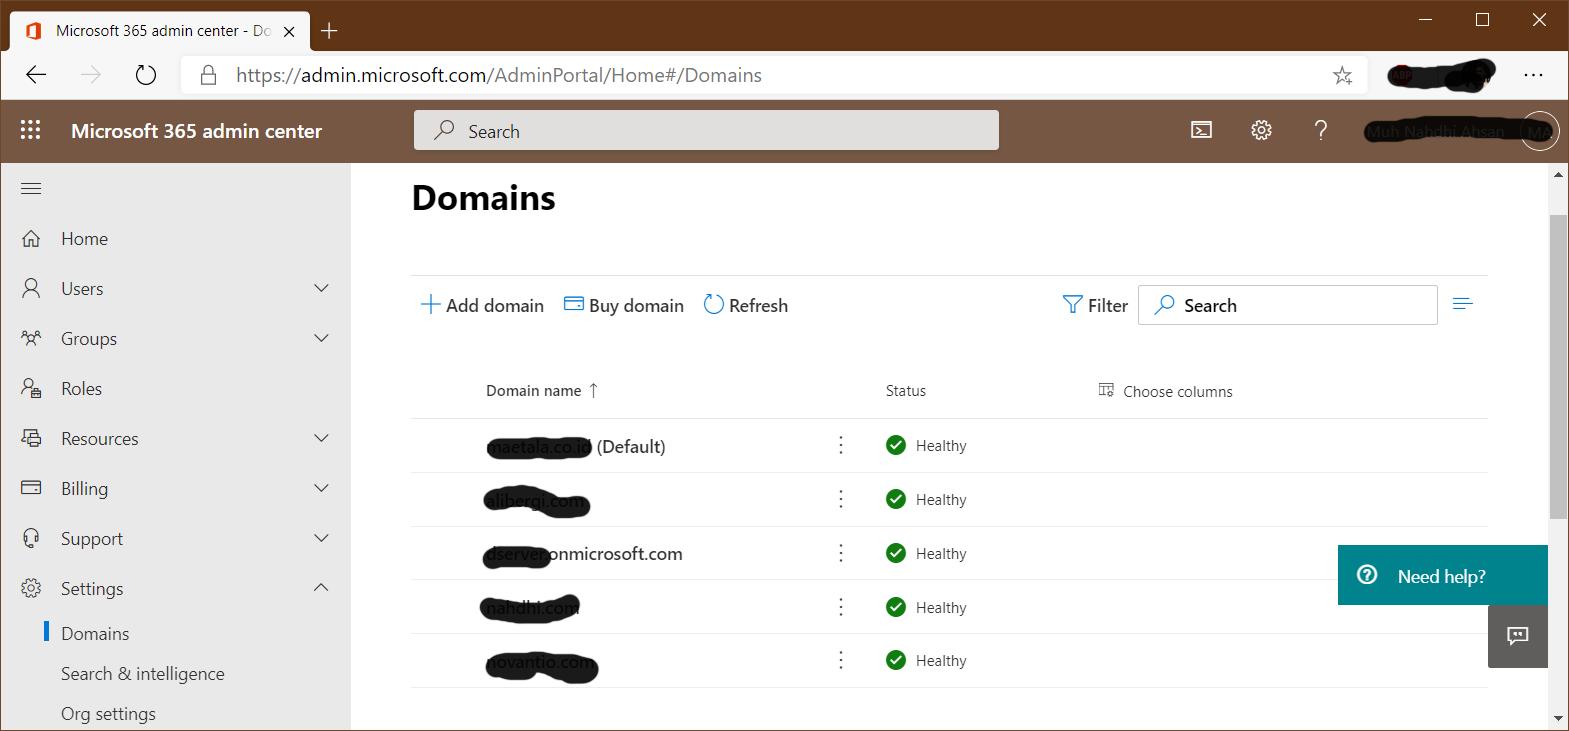
Set execution policy and create $credential variable and its value with username and password of Microsoft365 with Administrator privilege. In this note I will use dummy username is [email protected] and password is 123456. My primary domain is primary.dom , but domain I want to sign DKIM is my secondary added domain on Microsoft365, let say additional.dom. you can add domain through Microsoft Admin Center on Settings, Domains, Add Domain. Change this username, password, primary.dom, and additional.dom with yours. Use this command to set execution policy and create $credential variable:
Set-ExecutionPolicy RemoteSigned
$credential = Get-Credential
A small window to input username and password should be appear, this is for credential. Input username [email protected] and password 123456.
STEP 3: Connect to Azure Active Directory, Microsoft Online Service, and Exchange Online
Connect to Azzure Active Directory with previously set variable $credential:
Connect-AzureAD -Credential $credential
Output generated should be as bellow:
Account            Environment  TenantId      TenantDomain   AccountType
-------            -----------  --------      ------------   -----------
[email protected]   AzureCloud   xxxx-xxxx-…   primary.dom    User
Connect to Microsoft Online Service and Exchange Online using previously saved variable $credential:
Connect-MsolService -Credential $credential
Import-Module ExchangeOnlineManagement
Connect-ExchangeOnline -Credential $credential -ShowProgress $true
Output generated should be looks alike as follow:
The module allows access to all existing remote PowerShell (V1) cmdlets in addition to the 9 new, faster, and more reliable cmdlets.
|---------------------------------------------------------------------------|
| Old Cmdlets                         | New/Reliable/Faster Cmdlets         |
|---------------------------------------------------------------------------|
| Get-CASMailbox                      | Get-EXOCASMailbox                   |
| Get-Mailbox                         | Get-EXOMailbox                      |
| Get-MailboxFolderPermission         | Get-EXOMailboxFolderPermission      |
| Get-MailboxFolderStatistics         | Get-EXOMailboxFolderStatistics      |
| Get-MailboxPermission               | Get-EXOMailboxPermission            |
| Get-MailboxStatistics               | Get-EXOMailboxStatistics            |
| Get-MobileDeviceStatistics          | Get-EXOMobileDeviceStatistics       |
| Get-Recipient                       | Get-EXORecipient                    |
| Get-RecipientPermission             | Get-EXORecipientPermission          |
|---------------------------------------------------------------------------|
To get additional information, run: Get-Help Connect-ExchangeOnline or check https://aka.ms/exops-docs
Send your product improvement suggestions and feedback to [email protected]. For issues related to the module, contact Microsoft support. Don't use the feedback alias for problems or support issues.
If any difference showed, don’t worry. This output just an explanation ‘changelog’ of updated ExchangeOnline PowerShell Module.
Since you want to sign DKIM for your additional domain –additional.dom-. Make sure you are have privilege to modify DNS record of your additional.dom. Some of domain registrar or hosting provider has its own DNS management system. In this case, I use Cloudflare for my DNS Management. I assume you know how to add DNS Record on your registrar, hosting provider, or DNS provider. It is quietly similar procedure when you add additional domain to Microsoft365, you also add some DNS record of your domain. Microsoft also provide DNS Management on their Microsoft365 service. In this case your NS record pointed to Microsoft DNS management, autoconfiguration may apply.
STEP 4: Generate New DKIM Configuration
Continue on your PowerShell, create new DKIM Configuration by using this command:
New-DkimSigningConfig -DomainName additional.dom -KeySize 2048 -Enabled $True
You should get output on your PS like this one,
WARNING: The config was created but can't be enabled because the CNAME records aren't published. Publish the following two CNAME records, and then enable the config by using Set-Dkim SigningConfig.

selector1-additional-dom._domainkey.XXX***.onmicrosoft.com
selector2-additional-dom._domainkey.XXX***.onmicrosoft.com

Domain          Enabled
------          -------
additional.dom  False
It means your DNS record has no CNAME Record with DomainKey selector pointed to your Microsoft365 DomainKey.
STEP 5: Add CNAME Record to your additional.dom DNS Management
Type in PowerShell this command to know what kind of record should you add to your DNS management.
Get-DkimSigningConfig -Identity additional.dom | Format-List Selector1CNAME, Selector2CNAME
Result:
Selector1CNAME : selector1-additional-dom._domainkey.XXX***.onmicrosoft.com
Selector2CNAME : selector2-additional-dom._domainkey.XXX***.onmicrosoft.com
Add CNAME Record to your DNS management. In case you are using Clouflare, login to dash.cloudflare.com with additional.dom registered, select your additional.dom, and go to DNS. Click +Add record.
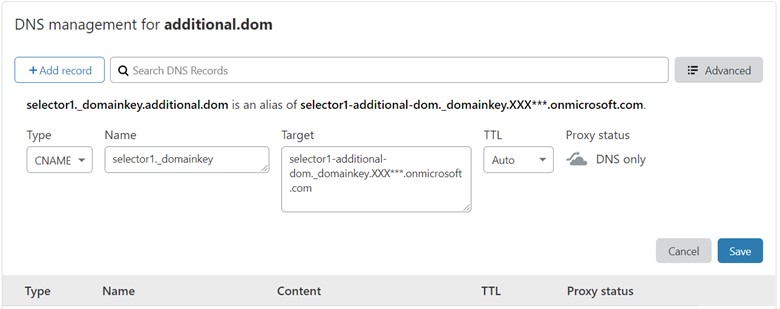
Choose Type with CNAME, fill in Name with “selector1._domainkey” and Target with Selector1CNAME result from above “selector1-additional-dom._domainkey.XXX***.onmicrosoft.com“, Leave TTL to Auto and change Proxy status to DNS only by clicking on orange-cloud logo next to Proxied text until it grayed, then click Save.
Repeat this step for selector2._domainkey. So, now you have 2 new CNAME Record as below:
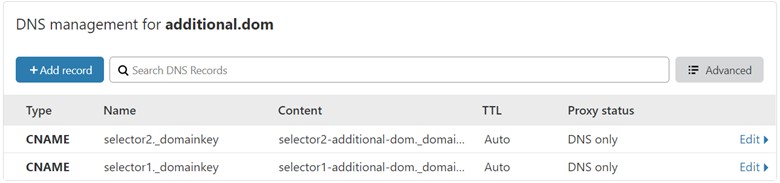
Other than Cloudflare, key point of this step is add CNAME Record to your DNS management as follow:
selector1._domainkey.additional.dom IN CNAME selector1-additional-dom._domainkey.XXX***.onmicrosoft.com
selector2._domainkey.additional.dom IN CNAME selector2-additional-dom._domainkey.XXX***.onmicrosoft.com
If you still confuse on add CNAME Record, leave comment on this post, I will reply as soon as possible after read your comment. Do not hesitate to bother me.
STEP 6: Apply New DKIM Configuration
After additional CNAME Record saved, wait for minutes and leaves DNS Resolver to update this change. In my case while using Cloudflare, Microsoft DNS Resolver takes around 5-10 minutes to update. Meanwhile, you can try to apply new DKIM through PowerShell as follow:
Set-DkimSigningConfig -Identity additional.dom -Enabled $true
If Microsoft DNS Resolver not yet updated (automatically), you will get error message as follow:
CNAME record does not exist for this config. Please publish the following two CNAME records first.
{0}
{1}
+ CategoryInfo : InvalidOperation: (:) [Set-DkimSigningConfig], ValidationException
+ FullyQualifiedErrorId : [Server=XYZ***,RequestId=xxxxxx-xxxx-…,TimeStamp=MM/DD/YYY HH:MM:SS AM] [FailureCategory=Cmdlet-ValidationException] XXXXXX,Microsoft.Exchange.Management.SystemConfigurationTasks.SetDkimSigningConfig
+ PSComputerName : outlook.office365.com
You can wait in minutes (again) and apply this new DKIM (again) until error disapear .
Set-DkimSigningConfig -Identity additional.dom -Enabled $true
If no more error appeared, it means your new DKIM config already applied.
NOTE: You can config another domain on your Microsoft365 by following STEP 4 – STEP 6 with your additional2.dom, additional3.dom, etc., without relogin to AzureAD and ExchangeOnline.
After finish configure DKIM to all your domain, don’t forget to close connection.
STEP 7: Close Connection
After all process above, remember to disconnect from AzureAD and ExchangeOnline through this command:
Disconnect-ExchangeOnline
Disconnect-AzureAD
Now you can safely close PowerShell.
STEP 8: Check DKIM Status Through Security & Compliance
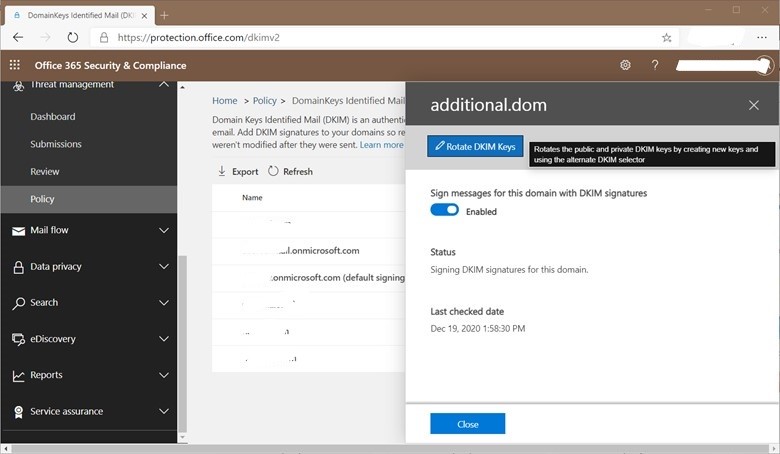
If anything is set, you can check through Office 365 Security & Compliance. On Threat Management > Policy > DKIM, select your domain additional.dom, make sure that Sign message for this domain with DKIM signatures status is set Enabled.
That is all you need to do to Configure DKIM for your domain on Microsoft 365 Online with ExchangeOnline.
Some suggestion would be appreciate….
Image Source:
DKIM Envelope Sign and Seal from Purple Envelope with Gold Sealing Wax | Sending fancy mail. | sk | Flickr
I use a self managed DNS record for my domain through BIND on a linux server. What should I do to add string CNAME on my BIND with proper format? Is that too long in term of string length?
I assume your installation of BIND is anything default, so you can simply add new line with this one in /var/lib/bind/[additional-dom].hosts:
selector1._domainkey.[additional-dom]. 3600 IN CNAME selector1-[additional-dom]._domainkey.[something].onmicrosoft.comselector2._domainkey.[additional-dom]. 3600 IN CNAME selector2-[additional-dom]._domainkey.[something].onmicrosoft.com